How do you apply exterior wooden shutters to your home?
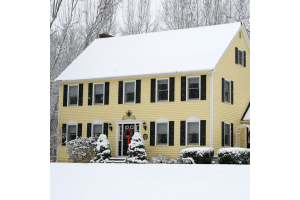
So you have reached that point where you want exterior wood shutters for your house. Adding shutters to a home will add value and boost its curb appeal.
What are the different styles of shutters?
Shutters come into four styles:
- Panel: They offer privacy, protection, and insulation. Wood panels can be flat, recessed, raised, or have other variations. Solid panel shutters incorporate a beveled or grooved section between the stiles and rails.
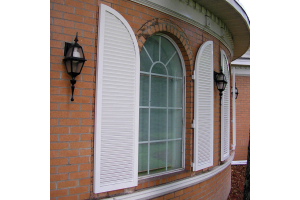
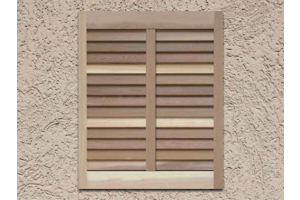
- Louvered: They are designed to allow for ventilation and variability in privacy and light. They are a good choice for winters as they allow ventilation even when closed to provide shade. These are either fixed or movable. The louver angle provides visual depth and added dimension to any home.
- Board and batten: Vertical panels are joined by horizontal boards known as battens. Traditionally used on barns, the design works with many architectural styles.
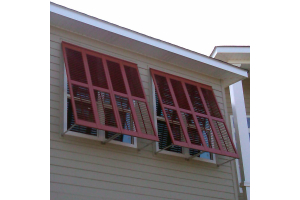
- Bermuda: They act as sunshades and as sturdy window protectors during the storms.
- Bahama shutters: They are used in tropical regions. They are constructed with one or more signature vertical sub stiles to create multiple steep louver banks.
Installation of shutters is a straightforward project and depending upon how many windows you have, the job is then very quickly with the right tools and some necessary skills.
The window configuration determines the procedure of installing wooden exterior shutters. The execution depends upon the objective outlined in measuring the outdoor shutters phase.
Wood shutter styles
We offer the most popular outdoor shutters of different styles. Every style is designed and crafted as per the client's needs. Mostly the component sizes are standard to fill most homeowners' needs, allowing us to streamline our manufacturing process and keep exterior wood shutters affordable.
How do you mount exterior shutters?
Make sure that you have the correct size of your windows. Shutters are fixed inside the window opening, and the shutter's width is half the width of the door. Before hanging, paint them. Then attach to window trim, or casing, with hinges to pivot into the window opening and when closed flush them with the case. To hold the shutters attach a piece of hardware called a shutter dog or rat tail. You will also need a latch to keep them closed.
Read the below guide. This guide will teach you how to apply exterior wooden shutters to your house.
Necessary installation tools
- Sturdy ladder
- Cordless drill
- ? inch drill bit
- Ratchet wrench set
- Hammer
- Wood filler
- Putty knife
- Tape measure
- Scratch awl or nail
- Sandpaper
- Pencil
Exterior wood shutters installation
Follow the below-mentioned steps for a successful installation of exterior wood shutters.
Step 1: First of all, in the wooden opening hold the shutters with shims to establish equal spacing on top and bottom with proper margins on both sides and middle. The lower rail of the panel is greater than the top. And the louvers will incline in the downside and away from the window.
To install windows outdoor shutters, approximately ? to ¼ inch is necessary to swing freely. To increase the clearance of outdoor shutters, you can trim them. To continue, cut the edge primarily and paint.
Step 2: You can observe and remove any obstructions that may stop the panels from swinging fully open.
Step 3: With the shutters still in the window, check where the outdoor hinges can attach. Use pieces of painter’s tape to spot each hinge location, which is very important and will help when installing multiple window shutters at one time.
Attach shutter hinges
Step 4: Now remove the panel and place them horizontally on sawhorses or any other flat elevated surface. The outdoor shutter side that was facing out will now be facing up. At one corner replace the painter's tape with the selected hinge.
Align the strap vertically to the edge of the panel and horizontally to the center of the rail.
Step 5: Tighten all screws and use an awl to mark each hole. Now mount all the hinges left in the same fashion.
Tip: Make sure to wear eye protection when using the hammer drill.
Step 6: With shims in place, return the exterior shutters to the window. Seat each pintle properly and embed a screw-on all your corners into the casing through the lower hole.
Now try to partially swing the panels to open and carefully lift off the pintles and not alter their alignment. Then fasten the other left pestle screws.
Step 7: Now, for the last time, place the panels on the window. And then extend wide to the side of the opening. Check the best shutter dog mounting point as shutter dogs keep the panels anchored against the home and rotate the panels to swing freely.
The shutter's lag bolt entry point should be roughly 1-½ inches from the bottom and ¼ inches wide from the outside edge.
Step 8: To accommodate the dog bolt, you have to pre-drill a hole. Ratchet the bolt so that when fully opened the back of the shutter dog meets the panel face.
Step 9: To complete the installation, Secure the remaining external hardware.
How can exterior shutters help your home?
Shutters add an architectural design and also perform several functions:
They offer ventilation in warm months, allowing breezes in while providing privacy.
- Provide insulation in winters.
- Keep the interior cool and act as a sunshade.
- They provide privacy while offering ventilation.
- Protect the windows from storm damage.
- Give protection from sun damage and protect the interior furnishings
Conclusion:
We hope this guide provides you with an extra dose of curb appeal for your house.
We strive to give you the right information so that you can make the right decision. So if you are searching for outdoor shutters, look no further than our designs and get them now for your home.