Fall Shutter Maintenance Checklist: 8 Steps to Get Your Shutters Ready for Winter
Fall is the best time of year to give your exterior shutters some attention. The summer sun has done its damage, winter weather hasn't arrived yet, and it's still warm enough for paint to cure properly. An hour or two of work now keeps small problems like loose screws, peeling paint, and nesting insects from becoming expensive ones by spring.
Here is the checklist we recommend to homeowners every October and November, whether your shutters are vinyl, wood, composite, or aluminum.
1. Walk the House and Inspect Every Shutter
Start with a slow lap around the house. Look at each shutter from the ground, then up close where you can reach safely. You're looking for:
- Damage to vinyl panels, especially on south- and west-facing windows that take the most sun.
- Peeling, blistering, or chalky paint on wood and painted composite.
- Soft spots or dark staining on wood, which can signal rot starting at the bottom edge or the louvers.
- Shutters that have shifted, sagged, or pulled away from the wall.
Take a photo of anything that needs work. It makes it much easier to plan repairs or measure for replacements later.
2. Clean Off the Summer Grime
Pollen, dust, and mildew build up through the warm months, and if they sit through a wet winter they can stain and break down the finish. A soft brush and a bucket of water with mild dish soap handles most shutters. Rinse with a garden hose.
Skip the high-pressure washer, especially on vinyl and older wood. A strong spray can force water behind the shutter, lift paint, and crack louvers. If your vinyl shutters already look washed out, our guide on how to restore faded vinyl shutters walks through bringing the color back.
3. Check for Wasps and Old Nests
The gap behind a fixed shutter is a favorite spot for paper wasps and mud daubers. In fall, the colony winds down, but new queens look for sheltered crevices to spend the winter, and the space behind a shutter fits the bill.
Look along the top and edges of each shutter for papery nests or mud tubes. If a nest is still active, our step-by-step guide to getting rid of wasps behind shutters covers how to deal with it safely. If anyone in your home is allergic to stings, call a pest professional instead. Once nests are clearly abandoned after a few hard frosts, scrape them off so the spot is less inviting next spring.
4. Tighten Fasteners and Inspect Hardware
Seasonal swings in temperature make shutters expand and contract, and over a summer that can loosen screws and fasteners. Snug up anything that wiggles, but don't overtighten into vinyl; a shutter that's clamped too hard can buckle when temperatures change. Our post on installing vinyl shutters with screws explains the right amount of play.
If you have working (operable) shutters, this is also the time to:
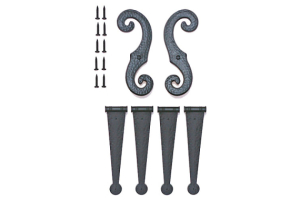
- Check hinges and pintles for rust and play, and add a drop of exterior-grade lubricant.
- Make sure your shutter stays and slide bolts hold firmly, so winter wind can't slam shutters open and closed.
- Replace any rusted or missing pieces now, while you can still work outside comfortably.
5. Touch Up Paint While It's Still Warm Enough
Paint needs warmth to cure, which is why fall has a short window for exterior painting. Most exterior latex paints call for air and surface temperatures of about 50°F or higher, and some cold-weather formulas are rated lower. Always check the label on the can you're using.
A few tips for fall painting:
- Paint in the late morning or early afternoon, after any dew has dried, and finish early enough that the paint can set before evening dew returns.
- Avoid days with rain in the forecast for the next 24 hours.
- Prioritize bare or peeling wood. Exposed wood absorbs moisture all winter and is where rot begins.
For prep steps and the best paint for each material, see our full guide to painting your exterior shutters.
6. Give Wood Shutters Extra Protection
Wood shutters need the most care before winter. Probe any soft spots with a screwdriver; if the wood is spongy, it needs repair or replacement before freeze-thaw cycles make it worse. Our guide to repairing wooden shutters covers small fixes like filling and re-sealing.
Make sure the bottom edges and the ends of louvers are painted or sealed, since end grain soaks up water fastest. And don't caulk shutters tight against the siding: a small gap behind the shutter lets water drain and air circulate, which is what keeps wood and siding dry.
7. Clear Gutters Above Your Windows
This one is easy to overlook. When gutters clog with leaves, rainwater spills over the edge and runs straight down the face of your shutters and window trim. Over a winter, that constant soaking leads to staining, peeling paint, and rot. Cleaning the gutters above shuttered windows protects them as much as anything you do to the shutters themselves.
8. Coastal Homes: Check Functional Storm Shutters
Atlantic hurricane season runs through November 30, and late-season storms do happen. If you rely on Bahama shutters or aluminum shutters for storm protection, open and close each one, confirm the hardware locks securely, and replace anything bent or corroded. Our roundup of the best hurricane shutters can help if it's time for an upgrade.
Planning New Shutters? Fall Is the Time to Order
If your inspection turned up shutters that are damaged, rotted, or faded past saving, ordering in the fall puts you ahead of the spring rush. Custom shutters are made to order, so lead time matters. Here are our current estimated delivery times:
| Shutter Line | Estimated Delivery |
|---|---|
| Premier vinyl shutters | About 2 weeks |
| Custom vinyl shutters | 3–5 weeks |
| Wood shutters | 4–8 weeks |
| Composite shutters | 5–7 weeks |
| Aluminum shutters | 6–8 weeks |
Lead times are estimates and can stretch during busy seasons. If you need shutters by a specific date, call us at 888-790-7743 before ordering.
If you'd like fresh shutters up before holiday guests arrive, Premier vinyl is the quickest option. For wood, composite, or aluminum, ordering this fall means you can install as soon as the weather turns in spring. Not sure what size you need? Start with our measuring guidelines, or order samples to see colors and materials against your siding before you commit.
Your Fall Shutter Checklist at a Glance
| Task | Applies To |
|---|---|
| Inspect for damage, peeling paint, and rot | All shutters |
| Wash with mild soap and a soft brush (no pressure washer) | All shutters |
| Check behind shutters for wasp nests | Fixed shutters |
| Tighten loose fasteners without overtightening | All shutters |
| Lubricate hinges; test stays and slide bolts | Operable shutters |
| Touch up paint on days around 50°F or warmer | Wood and painted shutters |
| Seal bottom edges and louver ends; repair soft spots | Wood shutters |
| Clean gutters above shuttered windows | All homes |
| Test storm shutters and locking hardware | Coastal homes |
| Measure and order any replacements | Damaged shutters |
Frequently Asked Questions
Should I take my exterior shutters down for the winter?
No. Decorative shutters are built to stay up year-round. Removing and remounting them every season can loosen fasteners and damage siding. Inspect and secure them in the fall instead.
Can I paint shutters in the fall?
Yes, as long as temperatures stay within the range listed on your paint can, which for most exterior latex paints is around 50°F or warmer. Paint mid-day after dew has dried, and avoid rainy forecasts.
Do vinyl shutters crack in cold weather?
Vinyl becomes stiffer in the cold, so it's more likely to crack from an impact or from being screwed down too tightly. Do any repairs or reinstalls before temperatures drop, and leave fasteners slightly loose so the vinyl can expand and contract.
When is it safe to remove a wasp nest from behind a shutter?
Wait until the nest is clearly inactive, usually after several hard frosts in late fall. If it's still active or anyone in your home is allergic, follow our wasp removal steps or call a professional.
A little attention in the fall keeps your shutters looking sharp and protects your home through winter. When it's time for new shutters, browse our shutters by material or contact our team for help choosing the right fit.